Christian Schad (Schadographs)
thiese works of his are one of the erlyest instances of abstract photography. he would intentonly leave objects ontop of light sensetive poaper toabstruct the light hiting it .this created simplistic advansed shapews and paterns as seen above. it uses the invetive use of objects some clear some more opayeck and use them to creat these ghosrtly aftermath of what was once there and create uneque shapes and sow amazing patterns


Man Ray (Rayographs)
they used multiple objects and exposed them multiple times to create an interesting layered peace were the diferent exsposhers woukld efect how the final peace would become daker ere it was exsposed to the light . in one thay thay use clear object like the lense of the glasses and solid such as the beads of a neckles and ther all diferent with tsome using fillm to create a intresting blend of ligt and dark .


Laszlo Moholy-Nagy (photograms)
he mainly liked using regular objects such as his hand a paint brush and would use them to obscure the light on photographic paper and create unique works such as these with exposure and the in this it uses a doble layering leting more light in some sections and create some strange sights of the hand ith shadows and higlights in it with a solid black bacround and a coile some nett or mesh a drying rack


my own work


Ruth Erdt

in this work ruth erid used the shapes of buildings and lay them ontop of some paper panted in cyanotipe chemicals and create some cyanotypes it create a ghostly visage of the modern city's strutrtrure and the modern bleakness it create magnificent shapes and forms and intresting way of using the mind to create a tale. and this kind of work intreages me as most of my work is based around building and is also somthing that can be easaly translaited into photosensitive paper


these 4 are my initial 4 experiments with me enitaly putin a pcture on asitate clamped in to the exspander and then i placed other photose and some pages of books printed on to asatate onto photosensitive paper and for the last one i triyde combining solid object with a role of tape.
this is my final product o n A4 this combines all the aspects of the preveuse exsperiments and i shone the light for 5 and moved the objects around and i would do it for five more second .
EILEEN QUINLAN


in this work it seams like there is resemblance of objects or places with some kind of smearing effect or dripping ing all have something to do with a liquid almost . smearing, dripping and making the image almost blurred and i am intrigued by this works seeming hand sticking out the melting blend a leg driping with water and brush strokes like a water coler but black and white and a bluer peace with window shutters and this is sum-thing i like the look of for this and this is a good chans to better understand the way light works to further all my later work which will hopefully be mostly well made
my final peace

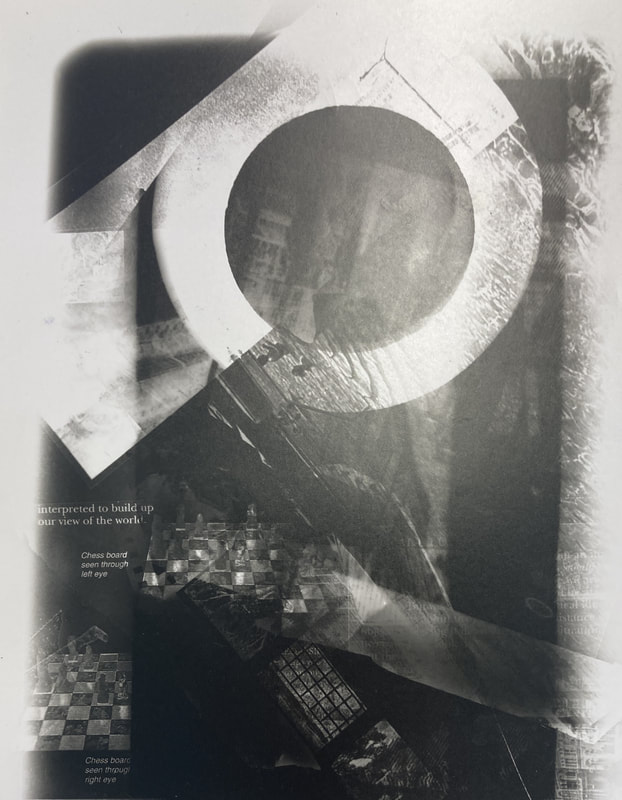
I'm satisfactorily pleased with this final peace it show just some of what i know what i could have done but i believe it will surface for what i have in mind when i look for a final peace on A3 paper i hopefully may have some more peaces i even have some ideas for this work now that if i get the chance like adding colour later it uses a combination of photo negatives i used my own original hand made negatives on acetate combined with objects i had on hand with me at time to blend te solid with the clear to sow diferent snapsahots of the paswt with objects of the present it is a reflection an idea careyd with me for years an part of my graiter exspance of art i am yet to do i used insperation form the bildings of Ruth Erdt and the layering of Laszlo. and
lumen prints
we took photo graphic paper and placed plants on top inside the frame and left them to the sun light and made shore that the light would hit aroun equil and getting the most light and the light .


Phone Photography natural sunlight obscuring those like using objects, such as plants to create a negative image of that of the objects, shape and form and as such is a form of photography because photo means like and businesses like to create the negative image of an object. To make mine are used to cheat of photosensitive paper and I used pants that I found around the school grounds to create a picture of David that comes with lumen prints. What went well with my piece is I got the negative image of the plants you could see a reasonable amount of details they were mostly alright and it was a looming print. It was how it should be in there wasn’t many mistakes. There was one area where it seem to have affected the print and remove some of the photo sensitive parts of the paper so that it could be smudged in a certain section. I don’t know why that aiera fail maybe it was due to the type pants are used an area it might be down to moisture any form of those things there anyway, I could find out how that could happen is to try and either re-create it and experiment and find out what works and what doesn’t so the only true way to work it out of improving is to experiment and attempt the same thing again, I might do I might not all depends on what time doing and what I decide to do.
Cyanotypes
with cyanotype is a combination of 2 chemicals coated on to a sheet of paper. the 2 chemicals are ferricyanide and ferric ammonium citrate which can come in powder form, liquid form , pre mixed or in pre coated sheets one recipe calls for "First off you need to measure 25g of Ferric Ammonium Citrate and add water to bring it up to 100 ml. Next, you measure 10g of Potassium Ferricyanide and mix that with water to make up to 100ml. Make sure both the chemicals are fully dissolved. Finally, under subdued light, mix the two solutions together." this recipe is located on pararallax photography coop


tise ar the 2 imiges ive chosen one of plants in nature and the other of a man made structure with lines these we will tern in to acetate negatives


here i took the 2 original images and turned them to black and white then inverted them


this secton i printed out the negetives on one sheet of A4 so they would be around right for A5 then printed them to acetate to create hand made negetives
then tay were layed out in such a manner and left them in the sun to develop

we used a mixture of water an bleach to turn the lighter areas of the image from a more yellow tinge
final peace for cyanotypes

in this peace i used 2 imegeds
i quite like this final peace thoghe there may be some improvements i could have made such as the imiges have alot of blank space and so thay could hav had some
Walead Beshty


in this work Walead Beshty paced cyanotypes and covered them from wall to celling they are random sporadic cyanotypes with them only and it shows how the cost of the cyanotype and the appearance of such work. the work consists of 12,000 cyanotypes the artist took in the course of one year a nd it is creatid the blue cyanotypes by obscuring it with objects that he had lying around in his studio .
pin hole camara
tjis is were we experimented the ideas of photography on the fundamental level by going back to the art forms roots using a dark box and natral sunlight let in through a smaller hole the size of the tip of a pin to help create an imige by first comresing and limiting the light to a small hole in and then enlarging it

This is just a small diagram of how a pin or camera utilises light to create an image of course it there will be photographic paper inside the box to capture the light but this is just a simple diagram.
Walter crump


in this work Walter crump uses a pin hole camera to take extensive elements of of mechanical elements.
practical experiments with pin hole camera


These three were my initial tests on the first day of the experimenting with the pinhole cameras As you can see with these I was struggling to get the image to fit the actual paper properly and Saulllll didn’t turn up properly and they left me to question what I could do to improve it and what can I do to fix this issue because it turns out the box are used was too shallow and I came back the next time you’re tempted to Remedy the issue


i dint necessarily have the photos of the original but you need to paint he inside black and it has to be done with a box or container that can seal perfictly to be black and i would recommend not using a shallow This is a form of me persevering and adapting my box to remedy this issue from last time by experimenting with expanding the distance between the actual Piece of Photosensitive paper and the pinhole itself which seemed to create better results also gave me the good slot on the side to load and unload sheets of Photosensitive paper.


These pieces have turned out significantly better though with that some of them. The father is to the left was my first test with The expanded camera. It is obvious that I moved while trying to capture the image as with the 2nd Image to the left you can see a blurred Outline around the centre spreading out the last one On the right it’s less obvious as I actually stayed still for that one and they’ve mostly still from the 2nd to the right. Mostly I believe they were primarily a success as there are points of this which has given me greater understanding on how panel cameras work and how if I want to continue how I can improve and adapt it and this helps me with my manual skills that I’ve been acquiring over my time in Photography and I started my photography with digital cameras moving down to film cameras and now I’m using pinhole cameras each teaching me a new aspect of Photography that was before I attempted completely unknown to me in many aspects or no into a minimal amount such as with the film camera where I knew some parts of it same with digital and with this there are the same fundamentals throughout all cameras no matter what and that is the way they utilize Light to capture the image that it could be contested with digital cameras I believe that is still the case as ISO is still a key part of using manual settings on the digital camera and ISO is the sensitivity to light. I hope at some point I will get to attempt something like this again or I could go forwards and attempt to learn from this in a numerous other parts that we would learn later on.


here i turned the phots form negative to positive using the invert feature in photo shop


these are my best ones so far in positive these aren’t t perfect but I quite appreciate the way it turned out its like an image you would find in some Lovecraftian horror as the proses is older than Lovecraft's works and this was an extensive proses used at that time though there is definitely some improvements that can be made to the work
